A PHP frontend workflow

An interesting article which explains how to do perform a workflow in your PHP project for your frontend code, without using NodeJS. The article introduces BowerPHP, mini-asset and Robo as alternatives to the NodeJS modules.

If you’re intimidated, exhausted or irritated by Gulp, Grunt, NPM, Yeoman, and all the other NodeJS tools that aim to help but often do the opposite, a good asset management workflow is possible in PHP, and this tutorial aims to prove it. In this article, we’ll go through a NodeJS-free PHP front end asset management setup.

Look, Ma! No NodeJS! – a PHP front end workflow without Node

Leave a Comment

NPM workaround for EROFS error

On my Virtualbox with lubuntu, upon running npm install I encountered problems with installing some packges.

npm ERR! rofs EROFS, symlink '../rimraf/bin.js'
npm ERR! rofs This is most likely not a problem with npm itself
npm ERR! rofs and is related to the file system being read-only.
npm ERR! rofs 
npm ERR! rofs Often virtualized file systems, or other file systems
npm ERR! rofs that don't support symlinks, give this error.

As the error explains, this probably has to do with the filesystem being virtualized. This was also in a shared folder with the host machine.

To work around this, use the –no-bin-link command option to prevent npm from attempting to create symbolic links. As a result, the commands of the package will not be available in _node_modules/.bin_. But it will still be available from the bin folder of the package itself.

Leave a Comment

Set charset on PDO connection with mysql in PHP

When using PDO to connect to MySQL it is wise to explicitly set the character set to utf8 (of course, only when using utf8 is the charset). In the MySQL or MySQLi extension I would normally execute the query SET NAMES utf8 to set it.

In PDO the charset can be specified in the connection string:

$conn = new PDO("mysql:host=$host;dbname=$db;charset=utf8", $user, $pass);

The charset option is only used since PHP 5.3.6, so take this into account when running an older version of PHP. In that case you should run the following statement after constructing the PDO object:

$conn->exec('SET NAMES utf8');

But you should’nt be running such an old version of PHP anyway.

Leave a Comment

Google Data redirectUri required

In a piece of code where authentication/authorization for Youtube was done, I only setting the redirect_uri in the piece of code where the logging in was done, using createAuthUrl(). This value is the location to redirect to when the authorization is completed and the user is redirected back to the invoking website.

In subsequent requests, when attempting to upload a video, the Client was throwing errors. It was not immediately clear what was wrong, but it turns out that even for non-authentication requests the setRedirectUri() function must be specified for the API to work.

Leave a Comment

Generate a public key from a private key using ssh-keygen

If you find yourselves with a private key, for SSH password-less login for example, and needing the public key, there is a simple command to generate the public key. It is Linux only however.

Simply execute:

ssh-keygen -y

It will ask you for the location of the private key (~/.ssh/id_rsa) by default and will then output the public key derived from the private key.

Leave a Comment

VirtualBox Alt+Tab in Guest

Normally when pressing Alt+tab to switch to a different window in the Guest OS the Host switches windows, so you lose the focus on the VirtualBox window. This happens even in Fullscreen mode.

You can change this behavior by pressing the Host-key once (default is Right+Ctrl). The Alt-Tab will then remain “inside” the host. Pressing the Host-key again will toggle behavior again.

Unfortunately there is not a way to see the current status of the behavior when in fullscreen mode. In windowed mode you see the status in the bottom right corner of the screen. There is an arrow key pointing down there. When lit, the Guest receives the key presses, else the host receives them. When you leave the Guest windows the status is always set to Off. So when entering the Guest again you need to press the Host-key to re-enable it.

Leave a Comment

Combining your own local git repository with Openshift for deploying

On Openshift you can deploy a multitude of applications. You do this by adding the code to a git repository and pushing the result to the Openshift servers. In some cases, when you are already developing the code and you don’t want to manually copy the changes to the openshift checkout it is cumbersome to keep this in sync.

Remote git url during creation

The simplest solution is to, during the creation of your application, specify a remote git url to store the app data in. If for some reason you do not want that (repository is not public for example), there is another way to fix this.

Local branch

In this solution, a branch on your local repository will be used to push the code to the master of the Openshift repository. This solution is based on a Stack Overflow post.

Application creation

First, create the Openshift application using the normal flow and checkout the git repository linked to this application. We do this, because we want the contents of the .openshift folder, this is used by Openshift for configuration of the Cartridge. We will later overwrite the data in this repo with our own local git repository.

Preparing the local branch

In your own git repository with the existing code, branch from the master (or any other branch you want to openshift code to be based on):

> git checkout -b openshift
> git remote add openshift <openshift-git-repo-url>

We have just created a local branch called openshift, and added a remote repository called openshift. We will be committing changes to the local branch and pushing them to the openshift repo.

Now copy the .openshift folder from the checkout done earlier and copy this to your local openshift branch. After this modify any configuration you may have to match the openshift application (database, log locations, etc.). Commit your changes.

Pushing to openshift repo

We will now push the local branch to the openshift repo. This is not as simple as executing a git push, because the local branch is called openshift, but on the remote repository we want to update the master branch.

> git push openshift HEAD:master -f

This command will overwrite the remote repo with all local changes, because of the the -f flag. The HEAD:master parameter will tell git to push the branch to the master of the remote repo.

For any subsequent commits there is no need to specify -f again, because the repositories are now from the same source.

Leave a Comment

Split SQL dump into smaller files

In larger projects database can grow to impressive sizes of several gigabytes. I recently found myself needing to restore a table from a backup. But my texteditor was unable to open the dump.sql files of several gigabytes. So I whipped up a small PHP script that splits the file into small chunks of 1 MB each.

The table I was looking for was not that big, so the the CREATE and INSERT statements related to the table would end up into one file. A small ‘Find in files’ search would then reveal the file to check.

This method will work for any type of file, not only .sql files.

<?php
$fp = fopen('dump.sql', 'r');

$iter = 1;
while (!feof($fp)) {
    $fpOut = fopen($iter . '.sql', 'w');
    fputs($fpOut, fread($fp, 1024*1024));
    fclose($fpOut);
    $iter++;
}

Leave a Comment

Update Second Crack from filethingie

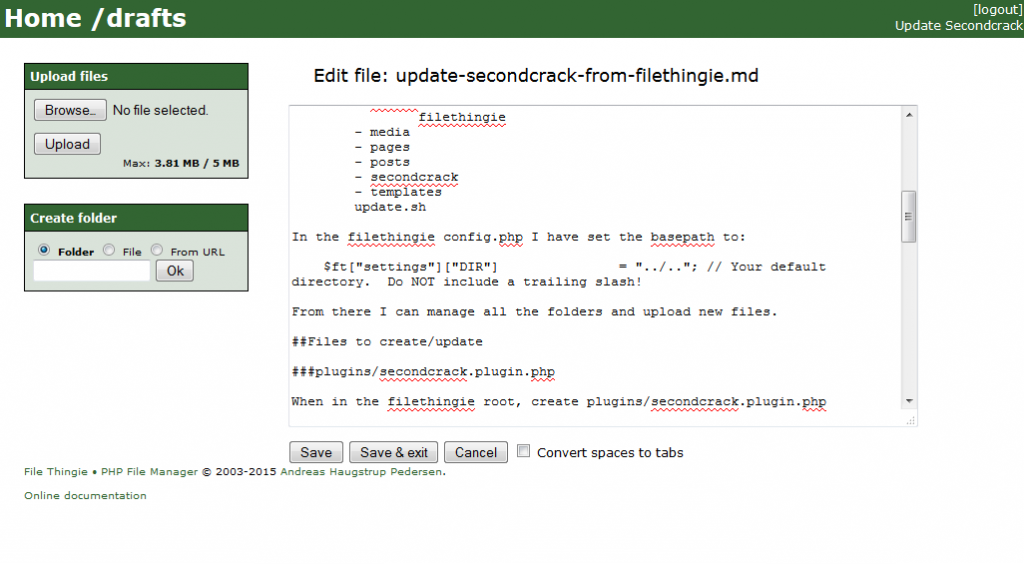
This blog post describes how to set up a filethingie installation and create a plugin to update your posts. It assumes that you already have a shell script in place to start the update of your blog.

Disclaimer: you are yourself responsible for securing the access to filethingie and the command to update secondcrack.
For the first step simply point the filethingie basepath to the second crack basepath. I use:

/srv/http/webapps/siteroot
- cache
- drafts
- htdocs
    filethingie
- media
- pages
- posts
- secondcrack
- templates
update.sh

In the filethingie config.php I have set the basepath to:

$ft["settings"]["DIR"]               = "../.."; // Your default directory.  Do NOT include a trailing slash!

From there I can manage all the folders and upload new files.

Files to create/update to update Second Crack

plugins/secondcrack.plugin.php

When in the filethingie root, create plugins/secondcrack.plugin.php

<?php
function ft_secondcrack_info() {
    return array(
        'name' => 'Secondcrack pugin',
        'settings' => array(
            'updatecommand' => array('description' => 'The command to update the blog', 'default' => '')
        )
    );
}

function ft_secondcrack_page($act) {
    global $ft;
    if ($act === 'secondcrack') {
        set_time_limit(0);
        $command = $ft['plugins']['secondcrack']['settings']['updatecommand'];
        $result = shell_exec($command);
        return 'Command run! Output: <i>' . htmlentities($result) . '</i>';
    }
}

function ft_secondcrack_secondary_menu() {
    return '<a href="' . ft_get_self() . '?act=secondcrack">Update Secondcrack</a>';
}

config.php

$ft['plugins']['secondcrack'] = array(
'settings' => array('updatecommand' => '[the updatecomand]')
);

Replace [the updatecommand] with the command you use to update secondcrack. I have created a small update.sh shell script that I placed in the root of the folder.

update.sh

#!/bin/sh

cd /srv/http/webapps/siteroot
/usr/bin/php ./secondcrack/engine/update.php >> /var/log/secondcrack.log 2>&1

echo "CLI: Executed update command for secondcrack."

This script assumes that there is a folder called secondcrack in the siteroot where the engine can be invoked.

Leave a Comment