Tag: howto

Remote debug a Tomcat Webapp

When developing a Tomcat web application I use the tomcat:deploy and tomcat-redeploy Maven targets to publish a new version of the webapp towards Tomcat. Not using
an IDE plugin which automatically connects to Tomcat forces me to do it manually. This is pretty easy!

catalina.sh / catalina.bat startup script

You can use the the catalina.sh (on Linux) or catalina.bat (on Windows) to control how Tomcat starts up. This script can be found in the bin folder of your Tomcat installation. Add the parameters jpda start to the script to start Tomcat
in its debug mode. In Windows, the complete command is:

catalina.bat jpda start

Under Linux it is:

./catalina.sh jpda start

Debugging

On startup Tomcat should now show a message similar to:

Listening for transport dt_socket at address: 8000

This means that Tomcat has started and listens at port 8000 for remote debug connections. You can now use your Java IDEs Remote Debug capabilities to connect remotely and set breakpoints and such in your IDE.

Leave a Comment

Mount SMB network folder in local folder on Windows

The mklink command is available in Windows since Windows Vista. It allows you to map a location as a subfolder on a NTFS file system. This behavior is comparable to the Linux ln alternative. SMB/CIFS network folders can also be mapped using this technique.

The command to do this is:

mklink /d C:\Folder\ShareName \\Server\ShareName\Directory\

The command explained:

  • /d is a flag that tells mklink to create a directory symbolic link instead of the default, a file symbolic link
  • C:\Folder\ShareName is the destination locate to map the network share to
  • \\Server\ShareName\Directory is the SMB network folder location to use as source A requirement is that the \\Server\ShareName\Directory location has been visited before and the credentials to access the share have been stored. Once the command has been executed the network folder is directly available at \\Server\Sharename.

Leave a Comment

Setting a PHP configuration value via htaccess

An Apache .htaccess file can be used to set specific configuration values for PHP in a website. This is a useful feature when looking for a temporary PHP setting specific to that website; for example when doing an upgrade.

To set a value use: _php_value _. Setting a boolean value is done using php_flag Off|On. An unlimited execution time can be set for example by placing php_value_time_limit 0 in the .htaccess file.

Overriding a PHP setting via .htaccess is not always allowed in the site configuration. To allow this the Options option must be added to the AllowOverride directive in the Virtualhost configuration of the site.

Leave a Comment

Installing Android SDK on Centos 6

Attempting to installing the Android SDK on a Linux server, for example your buildserver? This is an excellent guide on how to accomplish that. Following all the steps in this guides results in the SDK installing each and every SDK version available.

This webpage explains how to install only specific parts of the SDK. In short:

cd <your sdk folder>/tools
./android list sdk
./android update sdk -u -n -t 5,21

Where the numbers at the end of the last command are the numbers of the list in the output of the second command. The -n argument simulates the install, so you don’t actually download a few gigabytes of data accidentally. Run the command without -n to do the actual install.

Leave a Comment

Browse your personal Git repository online

After installing a Git repository on a webserver I’d also like to browse it using my webbrowser. We can do this via the gitweb package and some additional configuration in Apache. The assumption is that this is done on a Ubuntu system.

The result will be that repositories can be cloned via /git/repos/[name].git and browsed via /git/, within the same VirtualHost. It is assumed that your VirtualHost is set up similar to the previous blog post on git on this blog.

First install gitweb via the apt-get package manager:

apt-get install gitweb

The configuration for gitweb is located at _/etc/gitweb.conf. _Only one line needs to be changed, at the beginning of the file; change the $projectroot value to the root of your git repository.:

# path to git projects (<project>.git)
$projectroot = "/var/git/repository";

The installation of the gitweb packace has placed a configuration file in /etc/apache2/conf.d/gitweb:

Alias /gitweb /usr/share/gitweb
<Directory /usr/share/gitweb>
	Options FollowSymLinks +ExecCGI
	AddHandler cgi-script .cgi
</Directory>

This causes the URL /gitweb/ to be mapped to the gitweb script, causing it to show up on every VirtualHost. We want it to show up only on the git.example.com VirtualHost. In order to do so, remove this configuration file. Modify the git.example.com (or any VirtualHost you have configured for git access) and add the following lines:

Alias /git /usr/share/gitweb
<Directory /usr/share/gitweb>
	Options FollowSymLinks +ExecCGI
	AddHandler cgi-script .cgi
</Directory>

Also remove the line

#ScriptAlias /git/ /usr/lib/git-core/git-http-backend/

and replace it with:

ScriptAliasMatch \
	"(?x)^/git/(.\*/(HEAD | \
	info/refs | \
	objects/(info/\[^/\]+ | \
	\[0-9a-f\]{2}/\[0-9a-f\]{38} | \
	pack/pack-\[0-9a-f\]{40}\\.(pack|idx)) | \
	git-(upload|receive)-pack))$" \
	/usr/lib/git-core/git-http-backend/$1

This causes all requests from the git commandline (push, pull, clone, etc) to be forwarded to the git-http-backend script, while all other requests are handled by gitweb.

Leave a Comment

Install private Git server under Apache and Debian

This guide lists all the step you need to take to install a git server which is accessible via http. If you have no need for https you can skip this part in the tutorial. After following all the steps it did not work immediately, I did have to tweak the apache configuration a little and install additional packages, the end result can be found below.

The git-core package was also installed using apt-get install git-core.

This VirtualHost configuration also limits access to only IP addresses in the subnet 192.168.*.* and requires a password, stored in the htpasswd file located at /var/www/git.example.com/git.passwd

Pay special attention to this line: ScriptAlias /git/ /usr/lib/git-core/git-http-backend/ and verify that the location of the git-core directory is correct. On some installations the path might be /usr/libexec/git-core/git-http-backend or something similar.

<VirtualHost>
    ServerAdmin webmaster@localhost
    ServerName git.example.com
    DocumentRoot /var/www/git.example.com/htdocs
<Directory>
        Options FollowSymLinks
        AllowOverride None
    </Directory>
    SetEnv GIT\_PROJECT\_ROOT /var/git/repository
    SetEnv GIT\_HTTP\_EXPORT\_ALL
    SetEnv REMOTE\_USER=$REDIRECT\_REMOTE\_USER
    ScriptAlias /git/ /usr/lib/git-core/git-http-backend/
    <Location>
        Deny from all
        Allow from 127.0.0.1
        Allow from 192.168
    </Location>
    <Location /git>
        AuthType Basic
        AuthName "Git Repository"
        AuthUserFile /var/www/git.example.com/git.passwd
        Require valid-user
    </Location>

    ErrorLog ${APACHE\_LOG\_DIR}/error.log
    # Possible values include: debug, info, notice, warn, error, crit, alert, emerg.
    LogLevel warn
    CustomLog ${APACHE\_LOG\_DIR}/access.log combined
</VirtualHost>

Read the next git blog post to learn how to also browse the git repositories using your webbrowser.

Create new git repository

To create a new git repository execute:

git init <span class="hljs-comment">--bare name_of_project.git</span>

On a remote machine you can checkout this project by executing:

git <span class="hljs-keyword">clone</span> <span class="hljs-title">http</span>://git.example.com/git/name_of_project.git

On the first push command to send the changes to the server, you need to specify that you were working on the master. The original repository was bare, so git does not know that yet. The command below takes care of that:

git <span class="hljs-built_in">push</span> <span class="hljs-built_in">origin</span> master
Leave a Comment

Install SVN server under Apache on Debian

A very good and readable howto is available at http://www.howtoforge.com/debian_subversion_websvn. I have made some additional changes after following this guide. The guide requires you to manually add each repository manually to the dav_svn.conf file. It is possible to do this differently, in a VirtualHost configuration. Do not enable the lines in dav_svn.conf but add the following lines to your desired VirtualHost configuration, in this example with ServerName svn.example.com:

<Location>
    Deny from all
    Allow from 192.168
</Location>
<Location /svn>
    DAV svn
    SVNParentPath /var/svn/repository/
    SVNListParentPath on
    AuthType Basic
    AuthName "Subversion Repository"
    AuthUserFile /var/www/svn.example.com/dav_svn.passwd
    Require valid-user
</Location>

In this configuration there are the following things to keep in mind:

  • The parent folder of my SVN repository is different than the mentioned guide, /var/svn-repos is changed to /var/svn/repository
  • Access to this repository is restricted to only a specific subnet (192.168.*.* which is my own local network) by the first Location directive
  • All repositories are accessible via _http://svn.example.com/svn/\[name of repository] . _The usernames and passwords are configured in the dav_svn.passwd file, generated with htpasswd -c _/var/www/svn.example.com/dav_svn.passwd _(do not forget to create the folder in /var/www).

Leave a Comment

Decrease video file size using ffmpeg

Ever felt the need to decrease a video in size? Here’s how, using ffmpeg.
This blog post is explained using Windows, but can be performed under any OS using ffmpeg. First, download ffmpeg using the ffmpeg website. For Windows I’d recommend download the static 32 or 64 bit downloaded, depending on your computer.
Store it somewhere on your computer where you will be able to find it, let’s store it at C:\Apps\ffmpeg.

Getting information on the file

In this example we will use a video file and attempt to decrease its size by lowering the bitrate. All other parameters (resolution, audio, video format) we’ll leave intact.
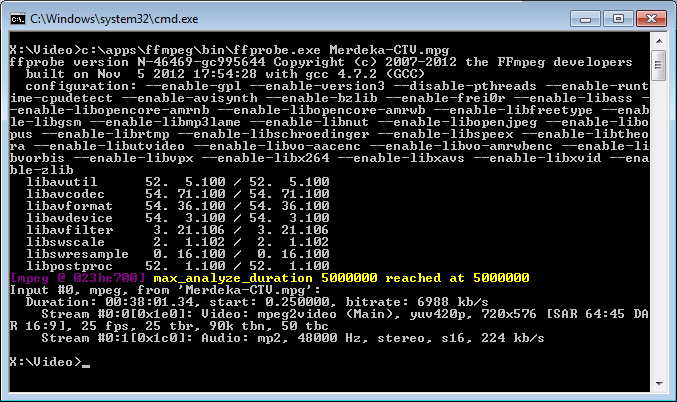
First, we get the information on the video file using ffprobe. Open a command windows, cd to the folder where the video resides and execute the following command, where video.mpg is the filename of the video:

C:\apps\ffmpeg\bin\ffprobe video.mpg
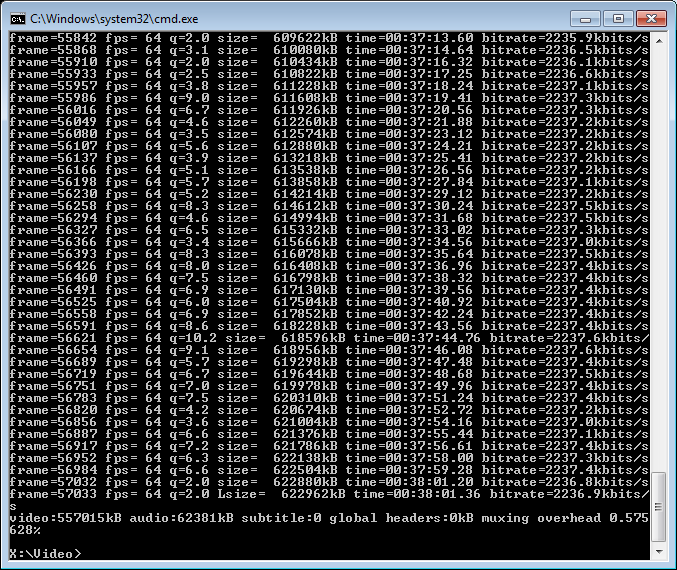
C:\Apps\ffmpeg\bin\ffmpeg -i video.mpg -s 720x576 -b:v 2000k -vcodec mpeg2video -acodec copy video_smaller.mpg

Leave a Comment